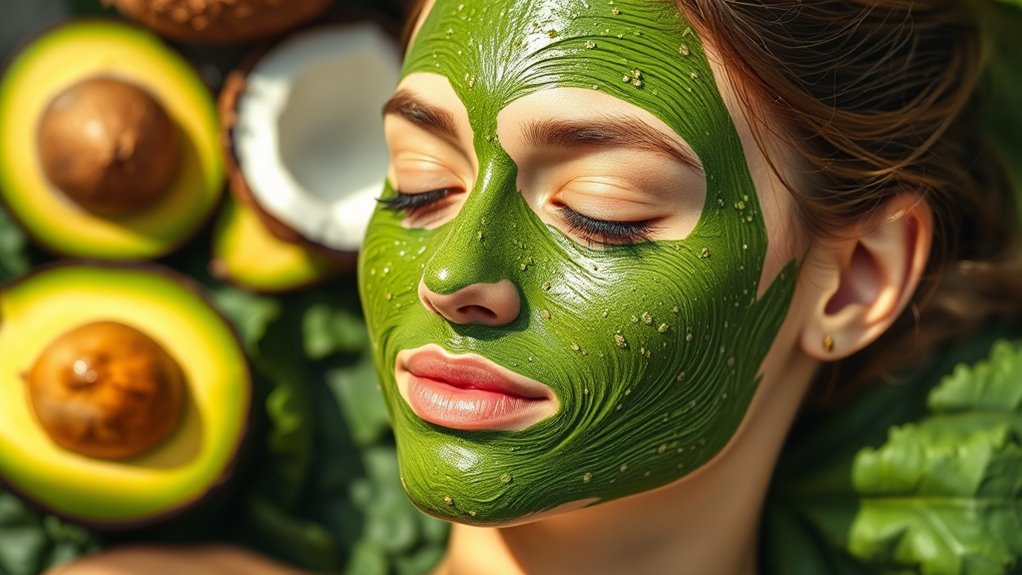
My Skin Loves This DIY Face Mask After a Long Day
After a long day, your skin craves the soothing touch of a DIY face mask. Just imagine the refreshing combination of ripe banana, honey, and yogurt soothing your tired complexion. As you apply it, the warmth envelops your senses, inviting relaxation. Let the mask work its magic, rejuvenating your skin while lifting your spirits. You’ll love how revitalized you feel! And there’s so much more to explore about crafting your perfect mask and its benefits.
Key Takeaways
- DIY face masks provide a relaxing self-care moment, perfect for unwinding after a long day.
- Ingredients like yogurt and honey nourish and rejuvenate tired skin, enhancing its appearance.
- A simple application process allows for quick and easy use whenever needed.
- Leaving the mask on for 15-20 minutes maximizes hydration and skin benefits.
- Post-mask care, like applying moisturizer, locks in hydration for lasting softness.
The Benefits of DIY Face Masks
When you think of self-care, DIY face masks might spring to mind, and for good reason. After a long day, there’s nothing quite like treating yourself to a relaxing face mask.
It’s not just about the pampering; it’s a moment to reconnect with yourself. As you slather on that soothing mixture, you can feel the stresses of the day begin to melt away. The gentle ingredients nourish your skin, leaving you refreshed and rejuvenated. Plus, a DIY face mask recipe can be tailored to your unique skin concerns, enhancing its effectiveness.
The act of creating your mask can be a creative outlet, allowing you to customize it to your skin’s needs. Embracing this ritual not only enhances your complexion but also uplifts your spirit, making it a perfect way to unwind and indulge in some much-needed self-love.
Ingredients You’ll Need
Creating your own face mask is as much about the ingredients as it’s about the experience.
For a refreshing blend, you’ll need a ripe banana, known for its moisturizing properties, and a tablespoon of honey, which acts as a natural humectant.
Add a tablespoon of yogurt to soothe your skin, and a sprinkle of turmeric for its anti-inflammatory benefits.
If you want an extra boost, a few drops of essential oil like lavender can enhance your relaxation.
Gather these ingredients in your kitchen, and feel the anticipation build as you prepare to pamper your skin. Each item you choose not only nourishes your complexion but also transforms your evening into a self-care ritual.
Incorporating natural ingredients into your skincare routine can significantly enhance your overall glow. Your skin will thank you!
Step-by-Step Instructions
Now that you’ve gathered your ingredients, it’s time to transform them into a soothing face mask. You’ll want to follow these simple steps for application and rinsing to maximize the relaxation and rejuvenation. Natural ingredients are key to achieving a revitalized complexion that feels hydrated and radiant. Let’s get started on this delightful self-care ritual!
Required Ingredients and Tools
To whip up a refreshing DIY face mask, gather a handful of simple ingredients that your skin will love. You don’t need a lot, just a few nourishing elements to transform your tired skin into a radiant canvas.
Here’s what you’ll need:
-
Honey – It’s a natural moisturizer, perfect for hydrating and soothing your skin.
-
Yogurt – Packed with probiotics, it helps to exfoliate and brighten your complexion.
-
Oatmeal – This gentle exfoliant calms inflammation and provides a soft texture.
You’ll also want a mixing bowl and a spoon to combine everything.
With these tools and ingredients at your fingertips, you’re ready to indulge in a rejuvenating experience that leaves your skin feeling refreshed and cared for!
Application and Rinse Process
Once you’ve mixed your ingredients into a smooth paste, it’s time to pamper your skin with the DIY face mask.
Start by gently cleansing your face to remove any dirt or makeup. With clean fingertips or a brush, scoop a generous amount of the mask and apply it evenly across your face, avoiding the eye area.
Take a moment to relax as the mask glides over your skin, feeling the soothing sensation settle in. Let it sit for about 10-15 minutes, allowing it to work its magic.
When the time’s up, rinse your face with lukewarm water, massaging gently to help remove the mask. Finish with a splash of cool water to refresh your skin, and pat dry with a soft towel.
Enjoy the glow!
Preparing Your Skin Before Application
Before you slather on that soothing face mask, it’s essential to give your skin some love.
Start by cleansing away the day’s grime, then follow up with a gentle exfoliation to reveal that fresh, smooth layer beneath. Incorporating a natural face cleanser into your routine can help remove impurities while nourishing your skin.
Trust me, your skin will soak up the mask’s goodness so much better!
Cleanse Your Face
As you unwind after a long day, cleansing your face becomes an essential step in your self-care routine. It’s your chance to wash away the stress and refresh your skin.
Here are three steps to make your cleansing process effective:
-
Choose the Right Cleanser: Pick a gentle cleanser that suits your skin type—something that feels good and removes dirt without stripping moisture.
-
Warm Water Rinse: Use warm water to open up your pores, allowing the cleanser to penetrate deeper and work its magic.
-
Gentle Massaging: As you apply the cleanser, take a moment to massage your face in circular motions. This not only helps with product absorption but also feels incredibly soothing.
With a clean slate, your skin will be ready for that fabulous DIY face mask!
Exfoliate for Smoothness
To achieve that smooth, radiant complexion you desire, exfoliating your skin is a crucial step that shouldn’t be overlooked.
Imagine wiping away the dullness of the day, revealing fresh, glowing skin underneath. Gently massaging an exfoliator over your face not only sloughs off dead skin cells but also boosts circulation, giving you that healthy flush.
You’ll feel the texture transforming, as rough patches soften, leaving your skin primed for your DIY face mask. Choose a product that suits your skin type—be it a scrub or a chemical exfoliant—to ensure you’re treating your skin right.
After this rejuvenating step, you’re not just ready; you’re excited to apply your mask and indulge in that pampering experience your skin craves.
How to Apply the Face Mask
Once you’ve gathered your materials and mixed your DIY face mask to perfection, it’s time to dive into the application process.
First, find a quiet spot where you can relax—this is your time! Here’s how to apply your mask for the best results:
-
Prep Your Skin: Make sure your face is clean and dry. A gentle cleanse will help the mask work its magic.
-
Use Your Hands or a Brush: Apply the mask using your fingertips or a brush, starting from the center of your face and moving outward.
-
Even Layer: Ensure you spread an even layer, avoiding your eyes and mouth. Take your time; this is a self-care moment!
Now, sit back and let the mask work wonders while you unwind. Enjoy the glow!
Recommended Duration for Mask Wear
When it comes to how long you should wear your face mask, it really depends on your skin type and the ingredients involved.
For some, a quick 10 to 15 minutes is all you need, while others might enjoy a longer session to really soak in the benefits.
After you’ve rinsed it off, don’t forget to pamper your skin with some post-mask care to keep that glow going!
Ideal Timeframe for Application
Although you might be tempted to leave a face mask on for as long as possible, it’s best to stick to the recommended duration to reap the most benefits without overwhelming your skin.
Generally, you’ll want to keep your mask on for about 10 to 20 minutes. Here’s a simple guide to help you determine the ideal timeframe:
-
Hydrating Masks: Aim for 15-20 minutes to let the ingredients deeply penetrate and nourish your skin.
-
Clay Masks: Stick to 10-15 minutes; leaving them on too long can dry out your skin.
-
Sheet Masks: 20-30 minutes is perfect for maximum hydration, but don’t let them dry out!
Skin Type Considerations
Understanding your skin type is key to maximizing the benefits of your DIY face mask.
If you’ve got sensitive skin, you’ll want to keep the mask on for just 10-15 minutes. Longer wear can lead to irritation.
For oily or acne-prone skin, 15-20 minutes is ideal, allowing the mask to absorb excess oil without over-drying.
If your skin leans dry, you can indulge for 20-30 minutes, letting those nourishing ingredients soak in.
Combination skin? Aim for around 15-20 minutes to strike that perfect balance.
Post-Mask Care Tips
After you’ve enjoyed your DIY face mask, it’s essential to treat your skin with the care it deserves.
You’ve taken the time to pamper yourself, so let’s make the most of it! Here are some post-mask care tips to enhance your glow:
-
Rinse Gently: Use lukewarm water to wash off the mask, ensuring all residue is gone without irritating your skin.
-
Moisturize Immediately: Apply a hydrating moisturizer while your skin is still damp. This seals in moisture and keeps your skin plump.
-
Give Your Skin a Break: Avoid heavy makeup or harsh products for at least a day. Let your skin breathe and revel in its newfound softness.
With these steps, your skin will thank you!
Rinse and Care for Your Skin After
Once you’ve peeled off that refreshing DIY face mask, it’s crucial to give your skin some TLC. Start by rinsing your face with lukewarm water to remove any residue. Pat your skin dry with a soft towel—no rubbing, just gentle taps. Follow up with a hydrating toner to balance your skin’s pH and prep it for moisturizer. This step is vital for locking in moisture and ensuring your face feels rejuvenated.
| Step | Purpose | Suggested Product |
|---|---|---|
| Rinse | Remove mask residue | Lukewarm water |
| Pat Dry | Avoid irritation | Soft towel |
| Tone | Balance pH | Hydrating toner |
| Moisturize | Lock in hydration | Nourishing moisturizer |
Your skin will thank you for this care!
Tips for Storing Leftover Mask
If you’ve whipped up a batch of your favorite DIY face mask and find yourself with some leftovers, you’ll want to store it properly to keep those nourishing ingredients fresh.
Here are a few tips to help you out:
-
Use an Airtight Container: Choose a small glass jar or a plastic container with a tight seal. This will prevent air from spoiling your mask.
-
Refrigerate: Most DIY masks can be stored in the fridge for up to a week. The cool temperature helps preserve their potency and prevents bacterial growth.
-
Label It: Don’t forget to label your container with the date it was made. This way, you’ll always know when it’s time to toss it out.
With these simple steps, you can enjoy your DIY mask even longer!
Frequency of Use for Best Results
To truly reap the benefits of your DIY face mask, you’ll want to use it regularly but not excessively. Aim for two to three times a week; this frequency allows your skin to soak up the nourishing ingredients without overwhelming it.
You’ll notice a difference in your skin’s texture and glow, making it feel rejuvenated and refreshed.
Listen to your skin—if it starts feeling sensitive or irritated, scale back. After a long day, applying your mask can be a comforting ritual, transforming your evening into a mini spa experience.
You’ll love how it feels to pamper yourself, and over time, you’ll find that consistency is key to unlocking your best skin yet.
Personalizing Your Face Mask Recipe
When you tailor your DIY face mask recipe to your unique skin type and concerns, you turn an ordinary skincare routine into a personal ritual.
Here are three ways to customize your mask:
-
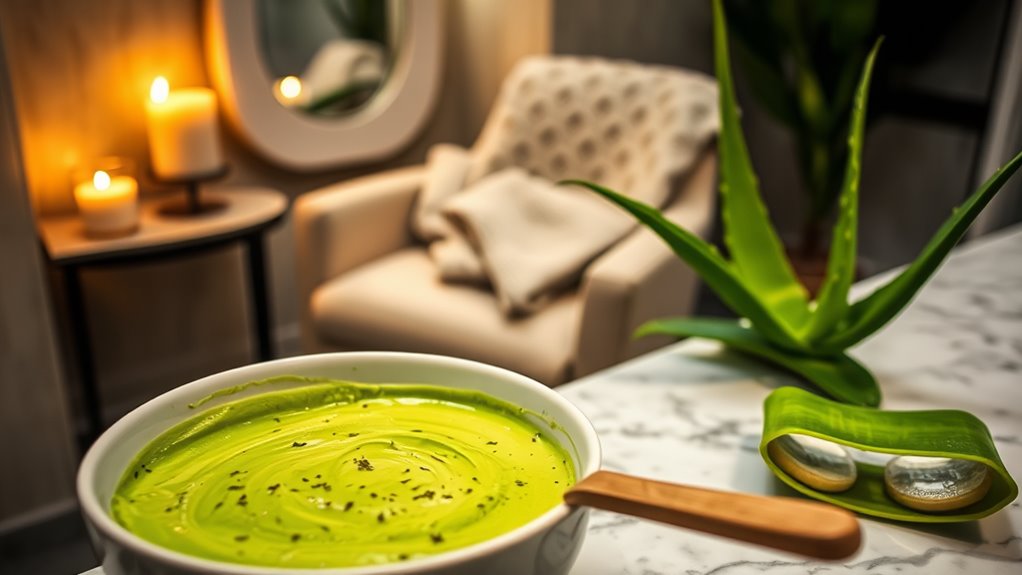
Hydration: If your skin feels dry, mix in honey or aloe vera for a soothing boost.
-
Exfoliation: For dull skin, add finely ground oats or sugar to gently scrub away dead cells.
-
Clarity: If you’re battling breakouts, tea tree oil or lemon juice can help clarify and balance your skin.