My Room Smells Like a Spa With This DIY Mist
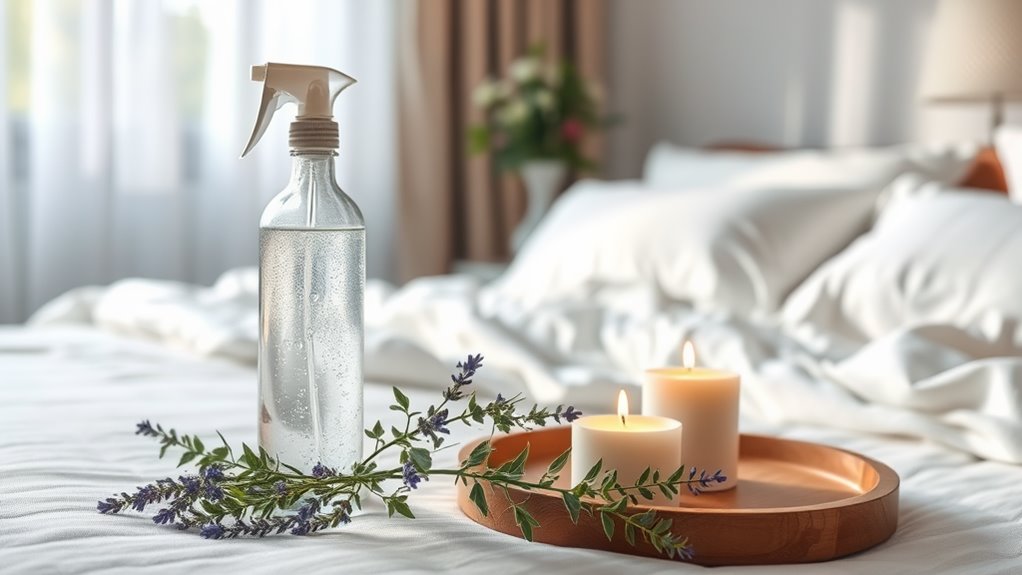
You can easily transform your room into a serene spa-like retreat with a DIY mist. Blend calming essential oils like lavender or uplifting citrus with a carrier fluid like distilled water or witch hazel. Just a few spritzes can create a refreshing ambiance, purifying the air and enhancing your mood. Proper storage is key to maintaining its potency, while the right application throughout your day amplifies relaxation. Discover even more tips to elevate your atmosphere further.
Key Takeaways
- Create a spa-like atmosphere by mixing essential oils like lavender and citrus with a carrier fluid in a spray bottle.
- Use distilled water or witch hazel as a base for your DIY mist to enhance the refreshing properties.
- Mist generously around the room and on linens to enjoy the calming scents throughout the day.
- Incorporate soft lighting and plush textiles to complement the soothing aroma and elevate your space.
- Shake the bottle before use to ensure an even distribution of essential oils for optimal fragrance.
Benefits of a Spa-Like Atmosphere
When you step into a spa-like atmosphere, it feels like a breath of fresh air, doesn’t it? The calming scents envelop you, instantly melting away stress.
Creating this serene environment at home is easier than you think, especially with a DIY essential oil mist. It not only elevates your mood but also promotes relaxation and mental clarity. The soothing aromas can transport you to a tranquil oasis, allowing you to escape the chaos of daily life. Plus, it helps purify the air, making your space feel revitalized.
One of the best aspects of this mist is that it can be customized with different essential oils to suit your personal preferences and needs. Whether you’re unwinding after a long day or setting the mood for self-care, a spa-like atmosphere can enhance your well-being.
Why not indulge in this simple luxury? You deserve it!
Essential Oils for Your DIY Mist
Creating your own DIY spa mist is all about selecting the right essential oils that resonate with your senses.
Consider lavender for its calming properties, perfect for unwinding after a long day. If you’re seeking an energizing boost, peppermint can invigorate your mind and refresh your space. For a warm and cozy vibe, vanilla adds a sweet, comforting aroma that envelops you like a soft blanket.
Don’t forget citrus oils like lemon or orange; they’re bright and uplifting, instantly enhancing your mood. Experiment with blends, too! Combining eucalyptus and rosemary can create a refreshing, herbal scent that feels like a walk in nature.
Trust your instincts—let the scents guide you to your ideal spa-like atmosphere. Incorporating these essential oils can harness the principles of aromatherapy to enhance your overall well-being.
Choosing the Right Carrier Fluid
After selecting your favorite essential oils, the next step is to choose the right carrier fluid to blend them with. Carrier fluids dilute essential oils, making them safe for use while enhancing their benefits.
You’ve got several options: distilled water is a popular choice for a light mist, creating a refreshing spray. Alternatively, consider using witch hazel, which adds soothing properties and a slight astringent effect.
If you prefer an oil-based mist, jojoba or fractionated coconut oil can provide a luxurious feel while moisturizing your skin. Just remember to select a carrier that complements your oils and suits your purpose.
The right carrier fluid won’t only help disperse the oils evenly but will also elevate your DIY spa experience! Additionally, using a carrier fluid that matches the properties of your chosen essential oils can enhance the overall fragrance and therapeutic effects.
Gathering Your Supplies
Embarking on your DIY spa mist journey requires a few essential supplies that will transform your vision into reality. To create your aromatic haven, gather the following items:
| Item | Purpose | Example |
|---|---|---|
| Essential Oils | Provide scent and benefits | Lavender, eucalyptus |
| Carrier Fluid | Dilute oils for safe use | Distilled water, witch hazel |
| Spray Bottle | Store and dispense your mist | 4 oz glass spray bottle |
With these supplies in hand, you’ll be well on your way to crafting a rejuvenating mist that fills your space with delightful, spa-like aromas. Each item plays a vital role in creating the perfect blend, so choose wisely! Creating your own essential oil room spray not only enhances your environment but also offers customization options that allow you to tailor the scent to your personal preferences.
Step-by-Step Guide to Making the Mist
Now that you’ve gathered your supplies, let’s get into the fun part: making your spa mist! You’ll need a few essential ingredients and straightforward mixing instructions to create a refreshing blend. Plus, I’ll share some tips on how to store and use your mist for the best results.
Essential Ingredients Needed
Creating your own spa mist at home can transform any space into a refreshing oasis.
To achieve that perfect scent, you’ll need a few essential ingredients that evoke tranquility and relaxation. Here’s what you should gather:
-
Distilled Water – This is the base for your mist, ensuring purity without any impurities.
-
Essential Oils – Choose your favorites like lavender, eucalyptus, or peppermint for a calming aroma.
-
Witch Hazel or Vodka – This acts as a natural preservative and helps the oils mix well with water.
-
A Spray Bottle – Opt for a dark glass bottle to protect the oils from sunlight and maintain their potency.
With these ingredients, you’re well on your way to creating a refreshing spa-like atmosphere in your home!
Simple Mixing Instructions
Once you’ve gathered your essential ingredients, it’s time to blend them into a soothing spa mist that will elevate your space.
Start by grabbing a clean spray bottle—preferably 4 ounces. Pour in 2 ounces of distilled water, followed by 1 ounce of your chosen carrier liquid, like witch hazel or vodka.
Next, add 10 to 15 drops of your favorite essential oils for that aromatic touch; lavender and eucalyptus are popular choices.
Secure the lid tightly, then shake gently to combine the ingredients. Allow the mixture to sit for a few minutes to enhance the scent.
Finally, give it another light shake before use. You’re now ready to enjoy your homemade spa mist!
Storage and Usage Tips
To ensure your DIY spa mist stays fresh and effective, it’s essential to store it properly. Follow these simple storage tips for the best results:
-
Use a Dark Glass Bottle: Light can degrade the essential oils, so opt for a dark-colored glass container.
-
Keep It Cool: Store your mist in a cool, dark place, away from heat sources to maintain its potency.
-
Label Your Bottle: Clearly mark the bottle with the contents and the date you made it, so you know when it’s time to refresh.
-
Shake Before Use: Essential oils can separate; a gentle shake ensures a well-mixed mist every time you spray.
Customizing Your Scent Blend
While you might’ve a favorite scent in mind, customizing your blend can elevate your DIY spa mist experience to new heights.
Start by selecting base notes, like calming lavender or grounding sandalwood, which provide depth. Then, layer in middle notes such as uplifting citrus or floral jasmine to create a harmonious aroma.
Finally, add top notes like refreshing peppermint or zesty bergamot for that initial burst of fragrance. Don’t be afraid to experiment—try different ratios until you find the perfect balance that resonates with your senses.
Consider adding a few drops of essential oils for added benefits, such as relaxation or invigoration. Your unique mix won’t only smell divine, but it’ll also create an ambiance that refreshes your spirit.
Tips for Proper Storage
Although you’ve crafted the perfect DIY spa mist, its longevity and effectiveness depend greatly on how you store it. Here are some tips to ensure it stays fresh and fragrant:
-
Use Dark Glass Bottles: Light can degrade essential oils, so opt for amber or cobalt blue bottles to protect your mist.
-
Keep It Cool: Store your mist in a cool, dry place away from direct sunlight and heat sources to maintain its potency.
-
Seal Tightly: Always ensure the bottle is tightly sealed to prevent evaporation and contamination from air exposure.
-
Label Clearly: Mark the bottle with the date you made it and the ingredients used, helping you keep track of freshness.
With proper storage, your spa mist will keep your space soothing for longer!
How to Use Your DIY Mist
Using your DIY spa mist can be a delightful experience that transforms your space into a calming oasis.
To enjoy its benefits, simply shake the bottle to mix the ingredients, then mist generously around the room. You’ll want to focus on areas where you spend the most time, like your bedroom or living space.
For an extra touch, lightly spray your linens, pillows, or curtains to create a lingering scent. You can also use it during meditation or yoga sessions to enhance your practice.
Don’t forget to reapply throughout the day whenever you need a refreshing boost. This simple ritual not only invigorates your senses but also promotes a peaceful atmosphere, making it easy to unwind.
Enhancing Your Room’s Ambiance
Creating a serene atmosphere in your room can significantly enhance your overall well-being.
By focusing on a few key elements, you can transform your space into a calming sanctuary.
Here are four ways to enhance your room’s ambiance:
-
Lighting: Use soft, warm lighting or fairy lights to create a cozy glow.
-
Colors: Choose soothing colors for your walls and decor, like pastels or earth tones, to evoke tranquility.
-
Textures: Incorporate plush textiles, such as soft throws and pillows, for a comforting touch.
-
Nature: Add plants or flowers to bring a breath of fresh air and a touch of nature indoors.
Incorporating Mist Into Your Routine
Incorporating mist into your daily routine can transform the ordinary into the extraordinary.
Start your day with a refreshing spritz to awaken your senses, and wind down in the evening with soothing scents that help you relax.
Don’t forget to pack a small bottle for travel, turning any space into your personal oasis wherever you go.
Morning Refresh Ritual
As you wake up and welcome the day, a refreshing mist can transform your morning routine into a revitalizing ritual. Incorporating your DIY spa mist into your morning can elevate your senses and set a positive tone. Here’s how to make the most of it:
-
Spritz Your Face: A quick spray on your face awakens your skin and boosts hydration.
-
Freshen Up Your Space: Mist your room to create an inviting atmosphere that energizes you.
-
Energize Your Hair: A light spritz on your hair can add a refreshing scent, making you feel more put together.
-
Enhance Your Meditation: Use the mist during meditation to deepen your relaxation and focus.
With these simple steps, you’ll embrace the day feeling refreshed and invigorated!
Evening Wind Down
After an invigorating morning, winding down in the evening is just as important for your well-being. As you transition into your night routine, grab your DIY spa mist and let its calming scent envelop you. A few spritzes around your room create a serene atmosphere, signaling to your mind that it’s time to relax.
Consider using lavender or chamomile essential oils, known for their soothing properties, to help ease the day’s stress. Take a moment to breathe deeply, inhaling the tranquil aroma.
Pair this with soft lighting and a good book or gentle music, and you’ll set the perfect backdrop for unwinding. Incorporating this mist into your evening not only enhances your space but also nurtures your mental peace.
Travel Aromatherapy Boost
Whether you’re embarking on a weekend getaway or a lengthy business trip, bringing your DIY spa mist along can transform any travel experience into a soothing retreat.
This little bottle of tranquility can help combat travel stress and create a calming atmosphere wherever you are. Here’s how to incorporate your mist into your routine:
-
Refresh Your Hotel Room: A quick spritz in the air can instantly uplift the ambiance.
-
Calm Nerves Before Flights: Spray a bit on your neck or wrists to ease anxiety during takeoff.
-
Revitalize During Layovers: A few sprays can invigorate your senses while waiting in crowded terminals.
-
Create a Sleep Sanctuary: A light mist on your pillow can promote restful sleep after a long day.
Traveling just got a whole lot more relaxing!
Troubleshooting Common Issues
While creating your DIY spa mist can be a relaxing experience, you might encounter a few common issues that could dampen your enjoyment.
If your mist separates, try shaking it well before each use, as oils and water don’t mix naturally.
If the scent’s too strong, dilute it with more water; you can always add more essential oils later. Conversely, if it’s too weak, boost the fragrance by adding a few more drops.
For a sticky residue, ensure you’re using the right amount of alcohol or witch hazel as a base.
Lastly, if your spray bottle clogs, check the nozzle for build-up and clean it with warm water.
Happy misting!
Additional Natural Fragrance Ideas
Have you ever wondered how to elevate your DIY spa mist with even more delightful scents?
Adding natural fragrances can transform your space into a serene oasis. Here are some ideas to get you started:
-
Lavender: Known for its calming properties, a few drops can promote relaxation.
-
Eucalyptus: This invigorating scent clears the mind and adds a refreshing touch.
-
Citrus Peels: Orange or lemon peels can brighten up your mist and uplift your mood.
-
Peppermint: A minty twist can provide an energizing burst, perfect for any time of day.
Experiment with these fragrances to find your perfect blend, and soon your room will feel like a luxurious spa retreat!


